PM Surya Ghar Muft Bijli Yojana: How to Apply Step by Step Guide:
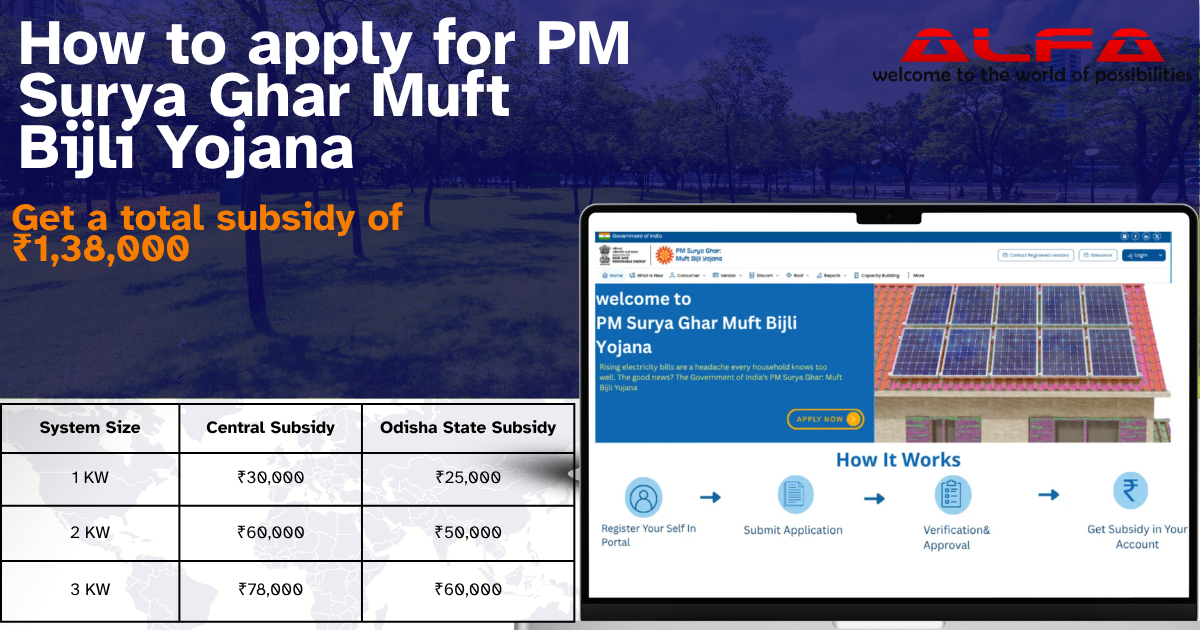
Imagine paying next to nothing for electricity — that’s the promise of the Government of India’s PM Surya Ghar: Muft Bijli Yojana. Launched in February 2024, this flagship rooftop solar subsidy scheme gives eligible households up to 300 units of free electricity every month, along with a direct government subsidy and access to collateral-free solar loans, all aimed at solarising 1 crore Indian homes
If you’ve been putting off applying because the process seems complicated, here’s the truth: it’s entirely online and can be completed in a handful of steps.
What You Get Under the
Scheme
- Up to 300 units of free electricity per month through net metering
- A direct cash subsidy of up to ₹78,000, credited straight to your bank account
- Collateral-free solar loans from empanelled banks to cover the balance cost
- Reduced monthly bills, often dropping close to zero for average households
How to Apply for PM Surya
Ghar Muft Bijli Yojana: Step by Step
Step 1: Register on the National Portal
Visit the official National Portal for Rooftop Solar at pmsuryaghar.gov.in and register using your state, your electricity distribution company (DISCOM), your electricity consumer number, and an Aadhaar-linked mobile number.
Step 2: Apply for Rooftop Solar
Once registered, log in and click “Apply for Rooftop Solar.” Select your state, district, and DISCOM from the dropdown options shown.
Step 3: Fetch and Verify Your Consumer Details
Enter your electricity consumer account number and click “Fetch Details.” The portal pulls your connection information for verification — make sure your name and address match your electricity bill exactly to avoid delays later.
Step 4: Choose Your System Size and an Empanelled Vendor
Based on your average monthly electricity consumption, decide on a system size (1 kW, 2 kW, 3 kW, etc.). Then select a registered, MNRE-empanelled vendor from the portal’s list and place your order.
Step 5: DISCOM Technical Feasibility Review
Your DISCOM reviews the application for technical feasibility — checking transformer capacity, feeder load, and grid connection — before approving it.
Step 6: Installation
Your chosen vendor installs the system. The panels and inverter must be ALMM-listed (on the government’s approved equipment list) — non-compliant equipment can get your subsidy claim rejected outright.
Step 7: DISCOM Inspection and Net Meter Installation
After installation, the DISCOM inspects the system and installs a net meter, which tracks the surplus electricity you export back to the grid and credits it against your bill.
Step 8: Commissioning Certificate
Once the inspection clears, the portal generates a commissioning certificate.
Step 9: Submit Bank Details and Claim Your Subsidy
Upload your Aadhaar-seeded bank account details on the portal. The central subsidy is
then disbursed directly via DBT (Direct Benefit Transfer) — typically within 30 to 90 days of commissioning.
How Much Does It Cost? (System Size vs. Subsidy)
System Size | Approx. Gross Cost | Central Subsidy | State Subsidy |
1 kW | ₹60,000 – ₹75,000 | ₹30,000 | ₹25,000 |
2 kW | ₹1,50,000 – ₹1,60,000 | ₹60,000 | ₹50,000 |
3 kW | ₹2,00,000 – ₹2,10,000 | ₹78,000 (capped) | ₹60,000 |
Actual costs vary by installer, equipment specification, and location.
Documents You’ll Need
- Aadhaar card (linked to your bank account)
- Latest electricity bill
- Electricity consumer account number
- Bank passbook or cancelled cheque
- Property ownership proof (if requested by your DISCOM)
Common Mistakes That Delay or Block Approval
- Non-ALMM panels or inverters — always confirm your vendor’s equipment is on the approved list
- Aadhaar not linked to your bank account — one of the most common reasons subsidy transfers get stuck
- Requesting a system larger than your sanctioned load — you’ll need a separate load-enhancement application first
- Mismatched name/address details between your application and your electricity bill
Frequently Asked Questions
Is PM Surya Ghar Yojana really free?
The scheme isn’t entirely free — you pay the net cost after subsidy (and can finance this with a collateral-free loan). What’s free is the electricity your system generates going forward, up to 300 units a month for a well-sized system.
How long does it take to receive the subsidy?
Typically 30 to 90 days after your system is commissioned and your bank details are verified on the portal.
Can I apply if I already have a solar system installed?
No — existing solar installations on the same electricity connection are not eligible for this scheme.
Do I need to hire a specific vendor?
Yes, installation must be done through an MNRE-empanelled vendor for your application to remain valid.
Why Choose the Right Installation Partner?
Since your subsidy and net metering approval both hinge on correct equipment, proper documentation, and passing DISCOM inspection, the vendor you choose matters as much as the scheme itself. Alfa India, an MNRE-empanelled Channel Partner based in Bhubaneswar, Odisha, with over 20 years of engineering experience, manages the entire process end-to-end — from portal registration and equipment selection to installation, inspection, and subsidy follow-up — so nothing falls through the cracks. Alfa India’s team can handle your entire PM Surya Ghar Yojana journey — from eligibility check to a fully commissioned, subsidy-approved rooftop solar system.Request a Free Site Assessment →